
Modified Gas Pedal Lever
The original gas pedal to shaft and lever joint can became worn allowing initial gas pedal movement (play) that produces no lever movement.
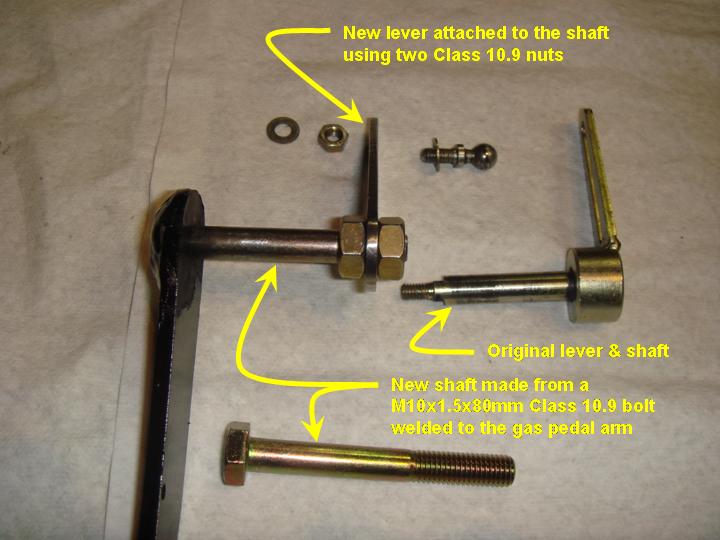
In this solution, the problem joint on the gas pedal arm is now welded solid and the lever now clamps firmly between two class 10.9, M10 nuts. The shaft no longer has the locating double D flats, but the torque capabilities of the M10 nuts is more than ample to hold the lever in position.
-
Note the new lever with holes instead of
a slot to simplify fabrication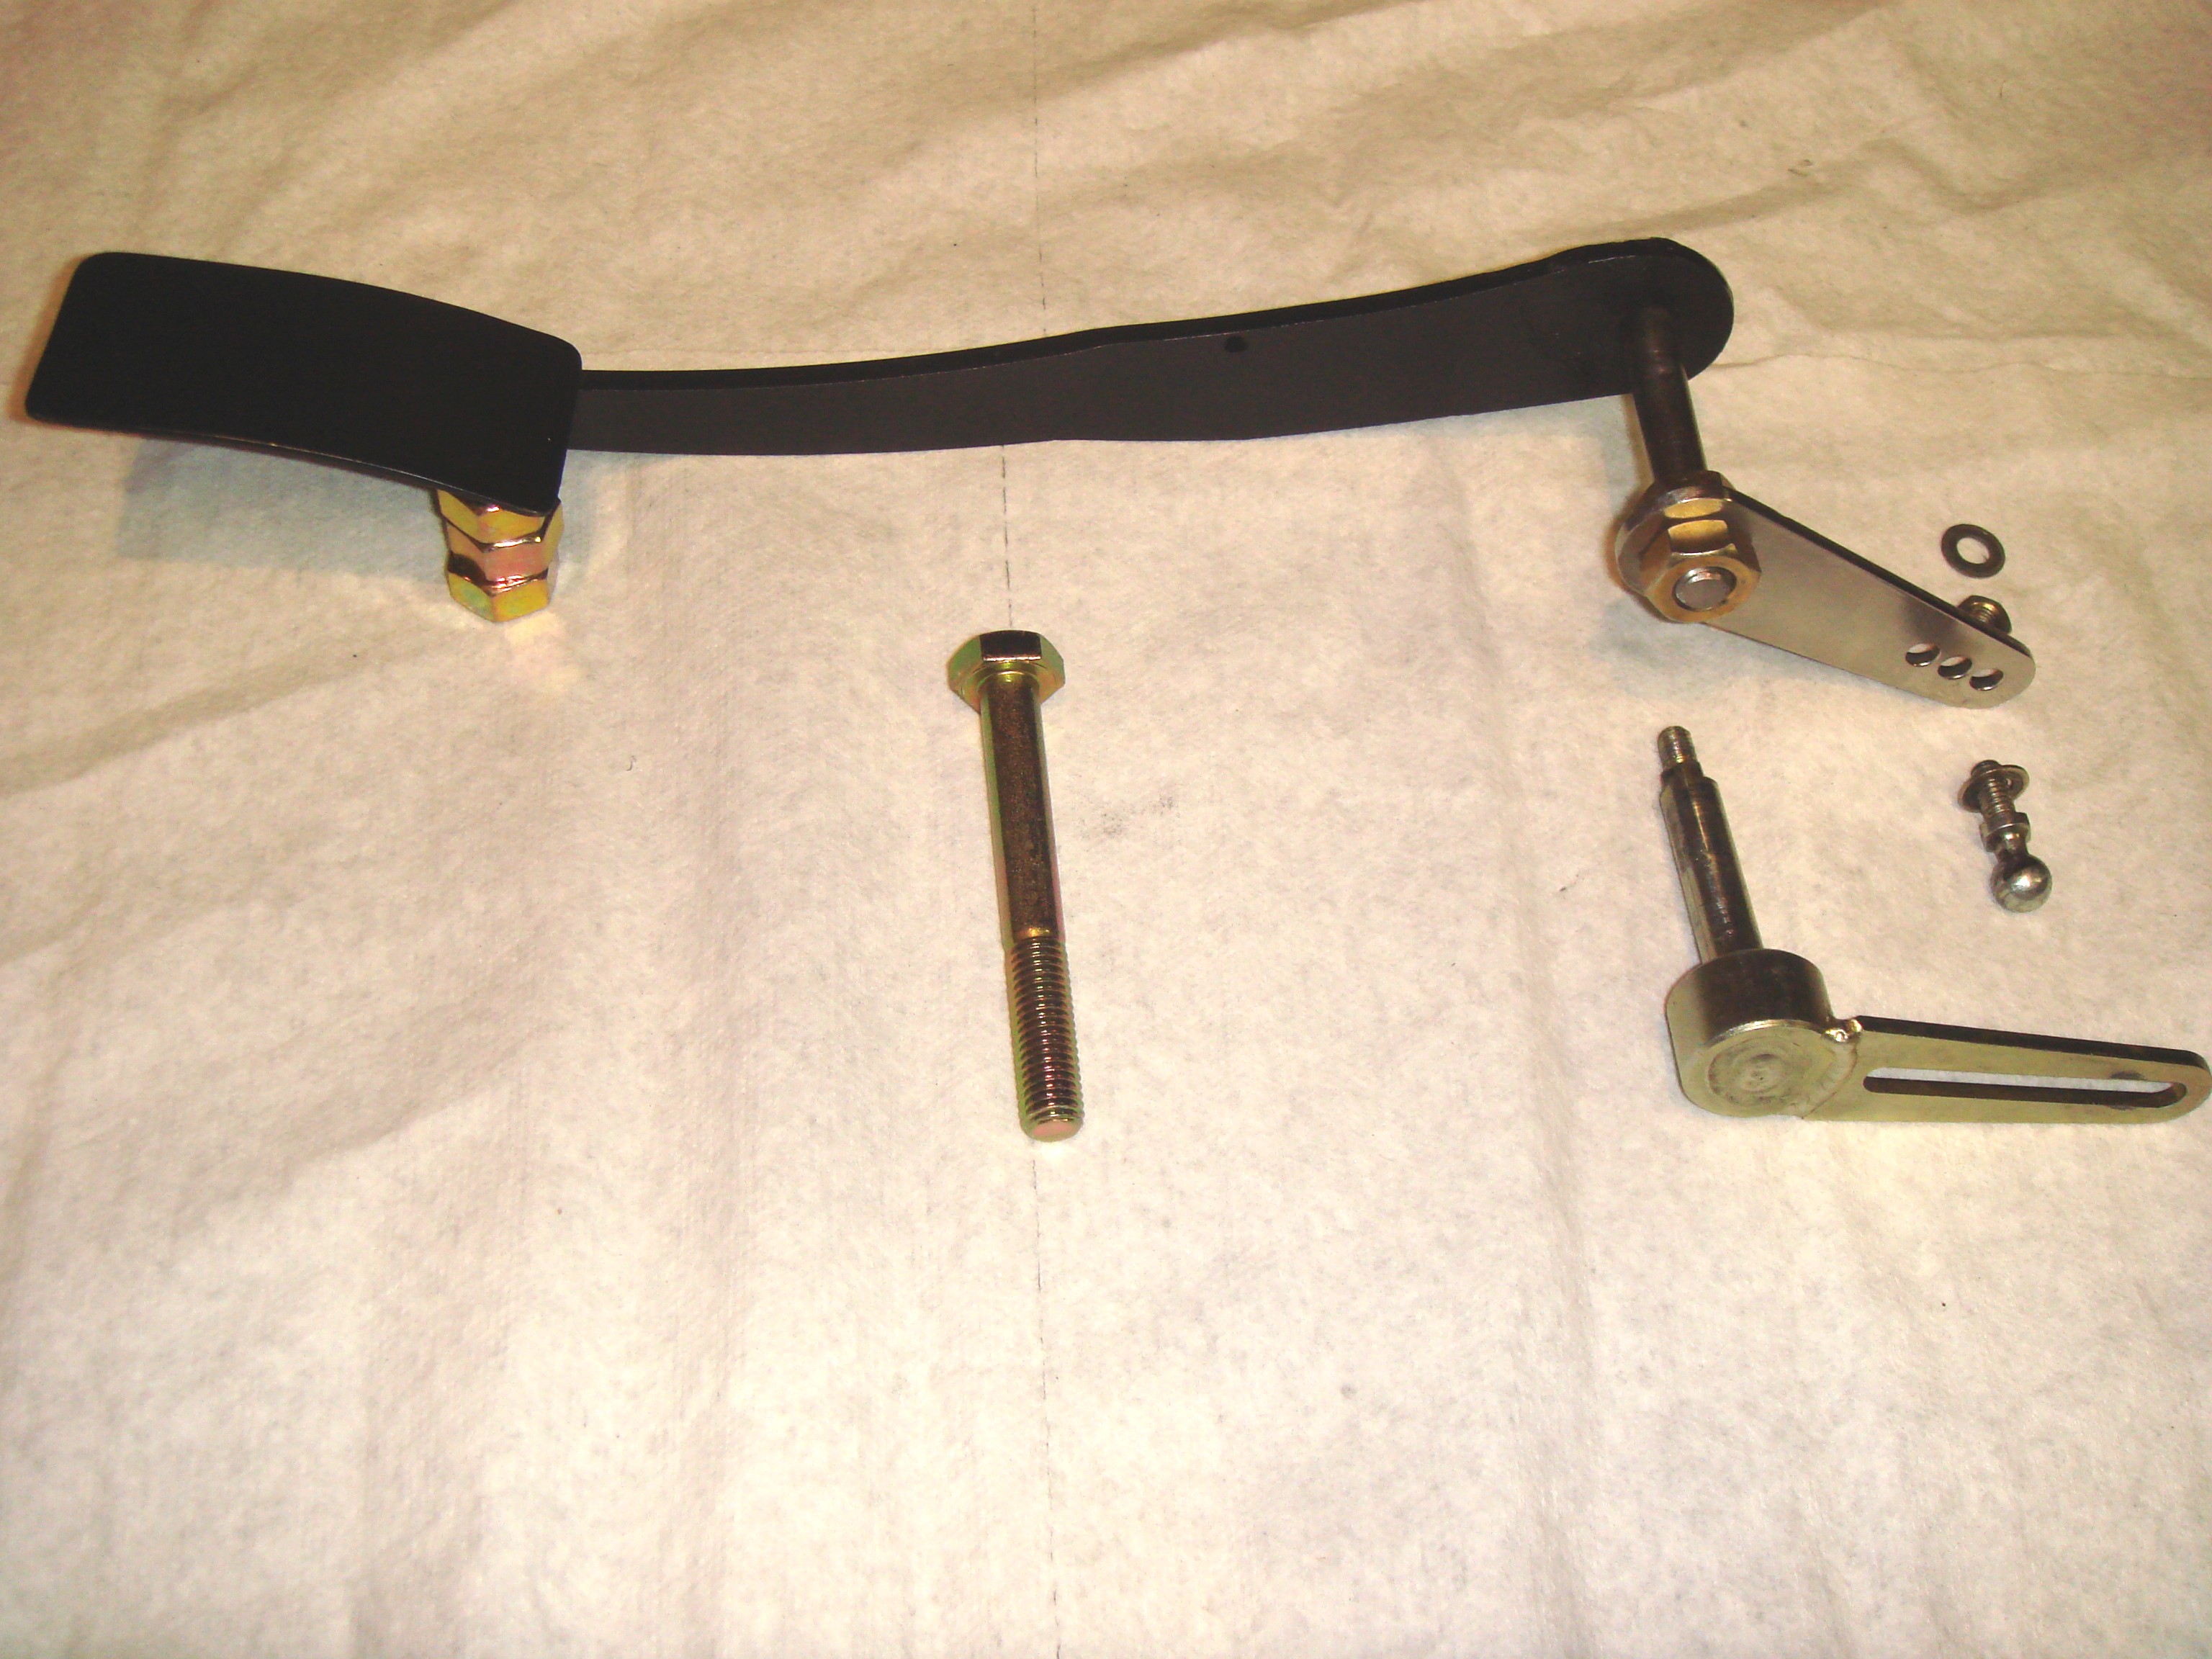
.............. A view of the new assembly under the
hood ..............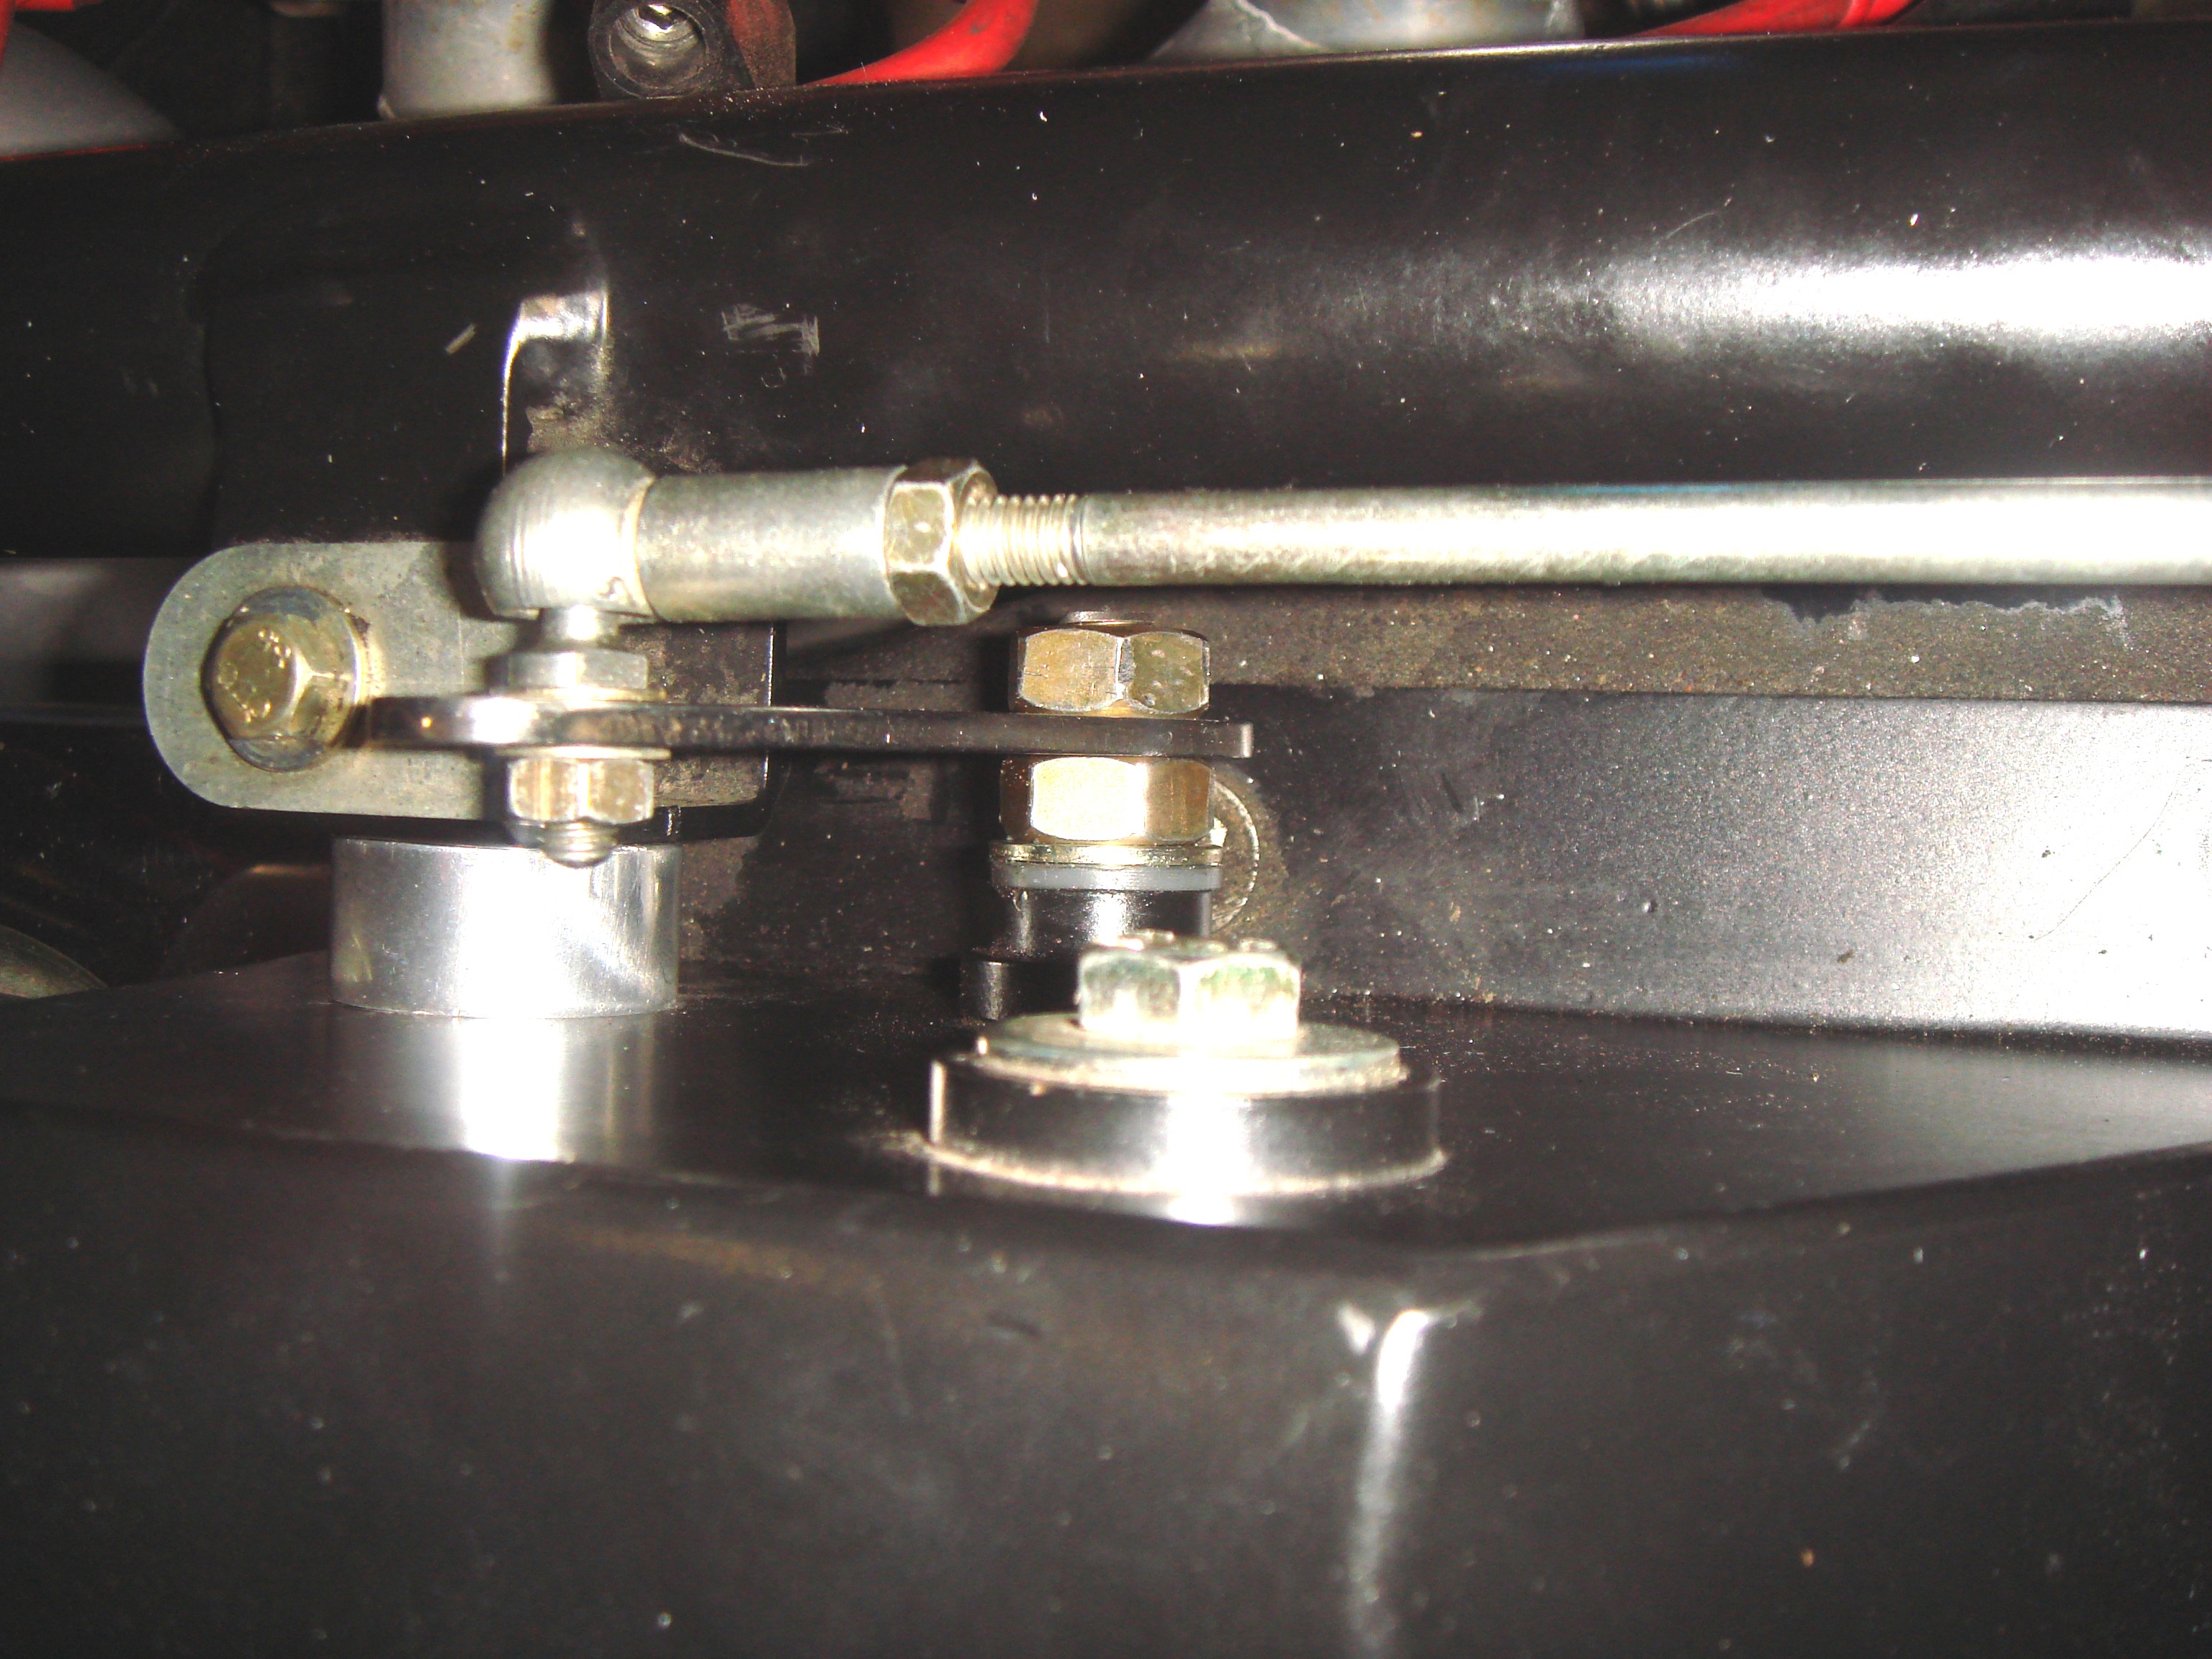
Gas pedal fix install instructions
Removing
original assembly
Remove pedal bell crank ball stud in engine bay
Remove pedal return spring in foot well
Remove pedal attaching nut (early cars) screw (cars after about 1800)
Remove pedal assembly from car.
Slide pedal bell crank into engine bay as far as possible. It will stop when it hits the steering column
The bell crank shaft is mounted in nylon bushings. The bushing should remain in their original position in step 5
Where the bell crank shaft is now exposed in the engine bay, cut the shaft with a Hack Saw Saws-All.
In step 7, the bell crank lever was removed. Now push the shaft back into the foot well for removal
Installing new
assembly
Drill the pedal arm attaching hole out to 10mm
Slide the supplied 10mm bolt through the hole
Weld the bolt head to the pedal arm. NO weld on the opposite side of the pedal arm
Grind about ½ the bolt head thickness off (Gives more room for reassembly)
Paint the welded area to prevent rust
Slide the new pedal assembly into position from the foot well.
Install the provided flat washer onto the bolt from in the engine bay.
Install one provided nut until there is about .020 clearance between the washer and the pedal box. Just enough clearance for the assembly to turn freely.
Slip the new bell crank lever onto the bolt
Install the second provided nut, finger tight.
Position the gas pedal as desired in the foot well. Should be about the same height as the brake pedal, but can vary some for drivers preference for toe/heel control.
Connect the throttle lever ball stud into the center lever hole. The top and bottom hole are provided for additional adjust ability, but should not be required.
At this point, the bell crank lever should be resting against the throttle stop.
With two open ended wrenches, tighten the two nuts locking the lever in place. No torque spec, but as tight as you can make them with standard wrenches.
Final checks
If properly tightened, there will be no binding (friction) of the bell crank in the pedal box.
With foot off the gas, the carburetor should be in it's idle position
With the pedal to the floor, the carburetor should be at WOT (wide open throttle) . If the throttle does not get to WOT or gets to WOT before the pedal gets to the floor, the linkage in the engine bay needs to be readjusted. It is important that there is no linkage binding.
-
Helpful tip
From the factory, the car is delivered with a spring to retract the gas pedal. A stock carburetor comes with another spring to close the throttle and most DOT inspectors will require a double spring from the throttle linkage to some fixed point (usually on the intake manifold) to ensure the throttle will retract. In all, this is often over kill and can be partially responsible for the original pedal failure. TIP. Remove and do not reinstall the the spring in the foot well. Adjust the double springs attached to the throttle lever so that they only provide a “light” pull to close the throttle. Test when done to make sure the throttle closes properly.